SMC new CAD SYSTEM (CADENAS)
- Table of content:
- Basic operation
- Others
Basic operation
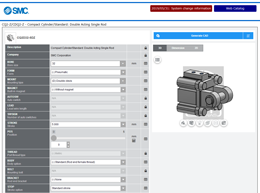
Product series selection
[Product series selection]
On the product series selection, you can expand and browse the product tree in order to select downloadable CAD contents.
After you select a product series, the display will switch to the options selection page.
Options selection
[Options selection]
Several configurable options are available for each product.
It is possible to configure the model with various options like stroke, mount, fitting, etc.
Login is required to download CAD models or refresh the preview.
Login
Click the "Generate CAD" button above the preview, and the display switches to the login as shown in the pictures below.
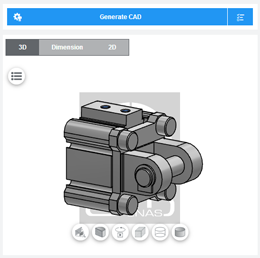
[Preview]
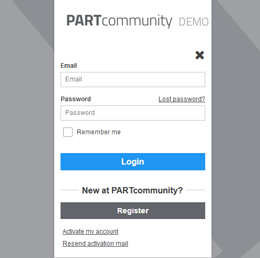
[Login]
You can log in with your registered Email and password.
(If you don't have an account yet, read "Registration" below.)
The user account for logging in is the same as the login account for various PARTcommunity services operated by CADENAS WEB2CAD Inc. (http://www.web2cad.co.jp)
If you are already logged in, your registered Email is displayed under the preview as shown in the picture below.
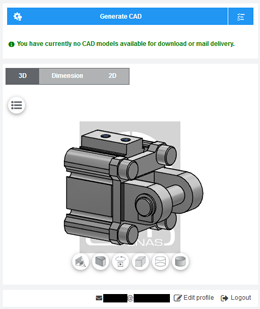
[Email displayed]
CAD download
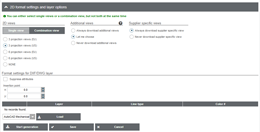
After clicking the "Generate CAD" button, you can select CAD formats.
Select one or some CAD formats and click the "Start generation" button at the bottom. After the CAD data generation is complete, you can download the model.

[CAD download]
You can select up to 3 CAD formats in one download operation.
You can also download 2D data by selecting the appropriate format.
If you want to download a drawing that combines 3 views or 6 views, select one or some 2D formats.
You can select "Combination view" inside the "2D format settings and layer options" below.
[Combination view]
The formats you set are stored.
If you want to change the formats, press the button on the right of "Generate CAD" and the format setting screen is displayed.
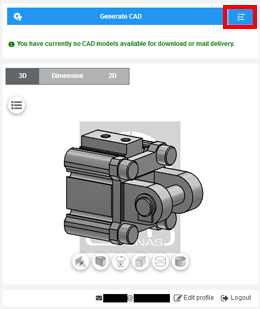
[Format setting]
Registration
User registration is completed in the following 2 steps.
STEP 1:
Enter your personal information on the website.
Enter your Email address and login password here.
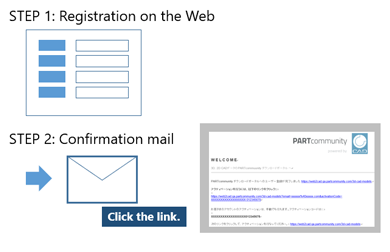
STEP 2:
Once your entry is complete, you will receive a registration confirmation Email for security.
The registration is completed by clicking the link of the Email. (Activation)
Please note that you will not be able to complete registration if you do not receive this Email.
The confirmation Email will be sent from mailservice@partcommunity.com.
STEP 1: Registration on the Web
Click the "Register" button.
The registration form as below is displayed. Enter required information.
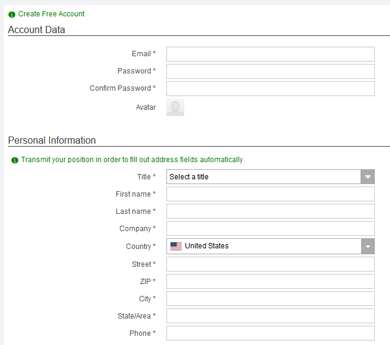
The Account Data (Email and Password) entered here will be necessary for logging in.
Remember or note them.
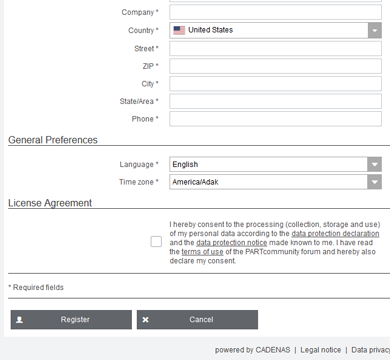
After completing the entry, read the contents of the "data protection declaration", "data protection notice" and "terms of use". If you agree with the terms, check the box and click the "Register" button.
If you move to the next screen, your application is complete.
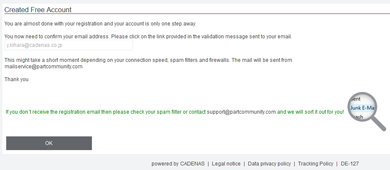
STEP②:Activation
You will receive an Email "CADENAS PARTcommunity - Account activation".
Click the link below in this Email.
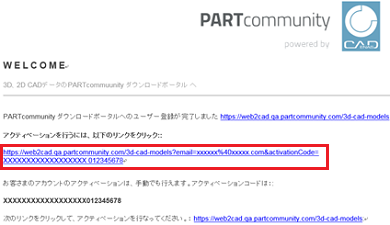
The user registration is now complete.
You can log in with the Email and Password registered.
Others
About the downloaded files
The downloaded data is compressed in a .zip file format.
Please use an appropriate decompression program to extract the data, then open it in your CAD system.
If you choose a macro file format (Solidworks, CATIA), the macro file corresponding to each CAD data is downloaded. When you run the macro in your CAD system, automatic modeling of the product data and type you selected will start.
How to read the macro file
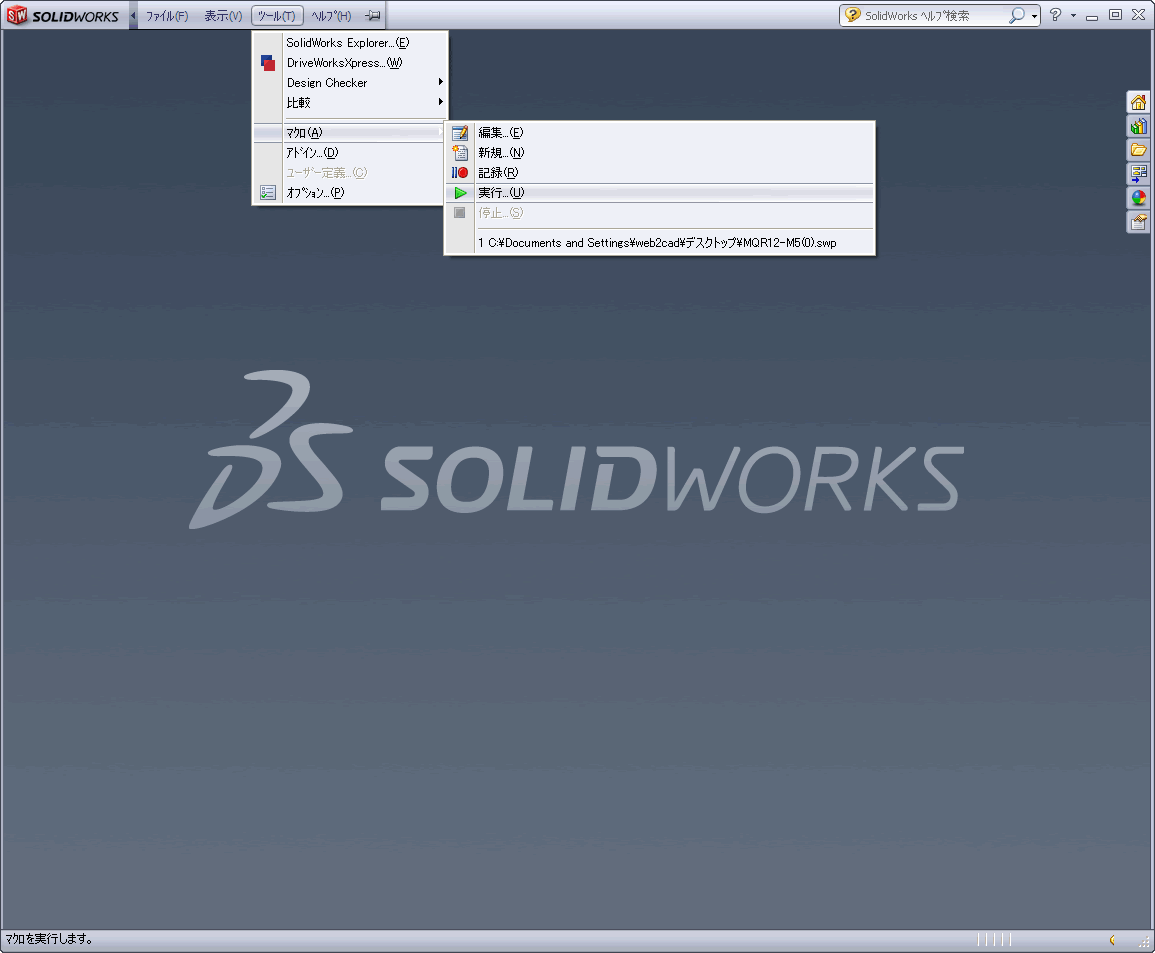
- Solidworks
- 1. Start Solidworks, the select [Run], then [Macro] from the [Tools] menu.

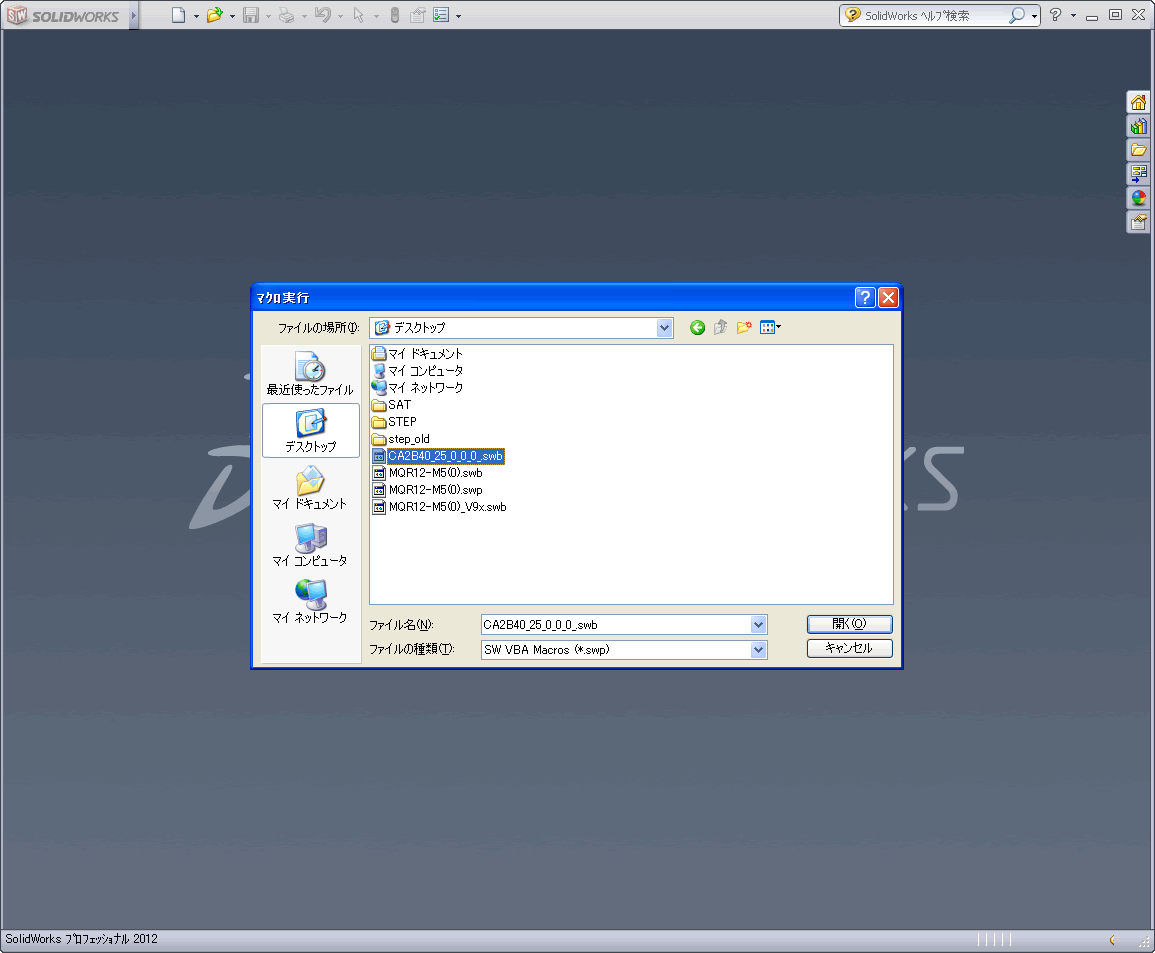
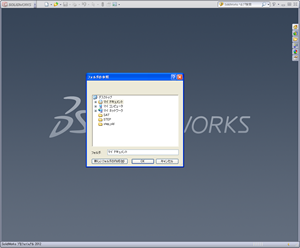
- 2. In the dialog box, select the downloaded macro file.
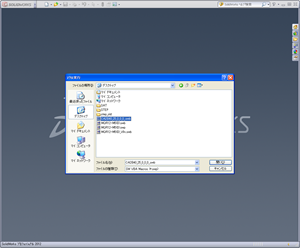
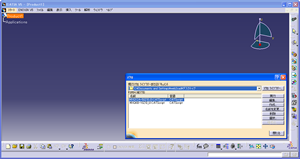
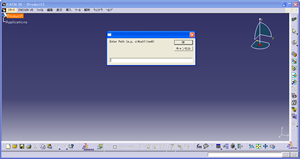
- 3. A new dialog box will appear, where you can select the destination folder for the CAD data automatically generated by Solidworks.
- 4. Please wait while Solidworks automatically generates the 3-Dimensional data.
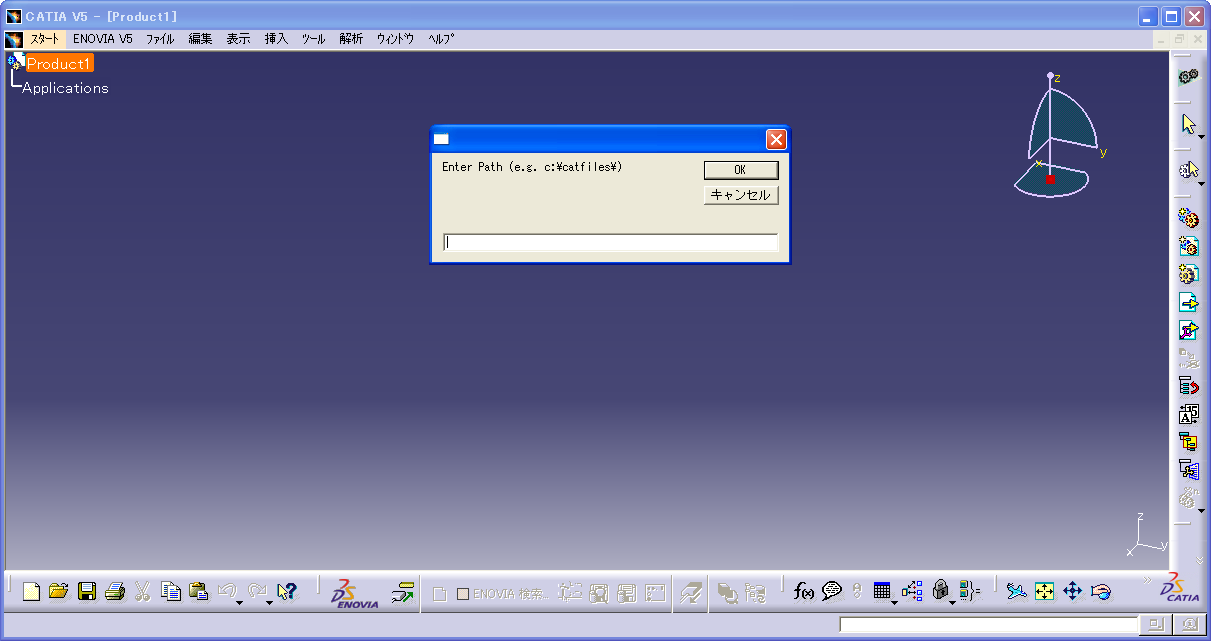
- CATIA V5
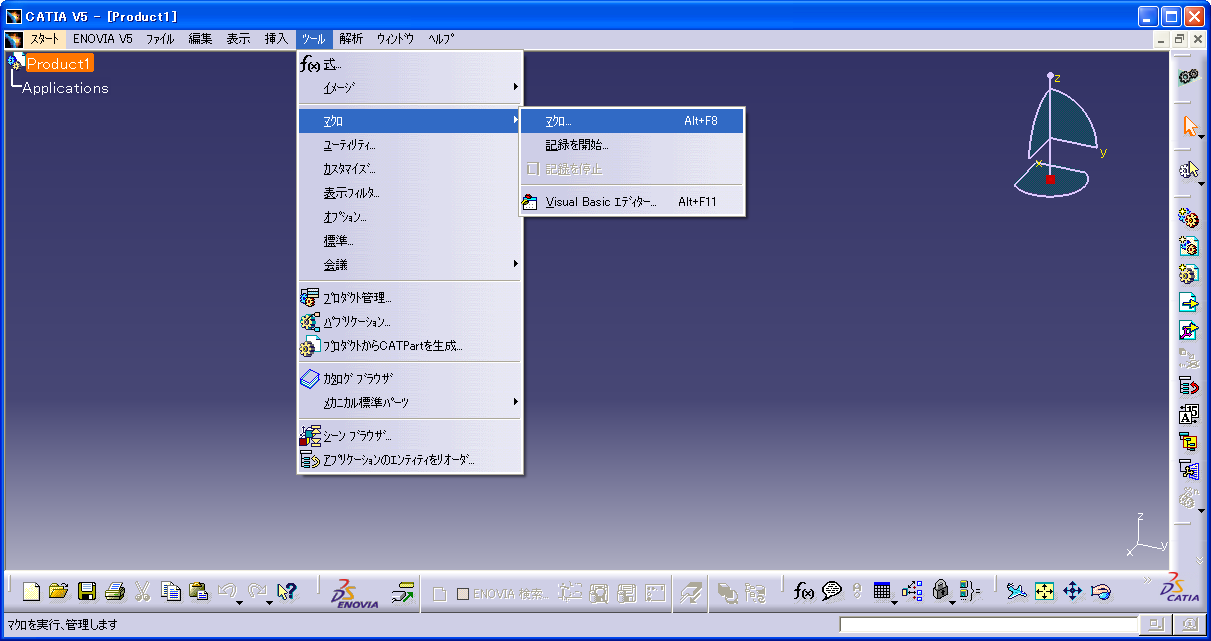
- 1. Start CATIA V5, then select [Macro] > [Macro] from the [Tools] menu.

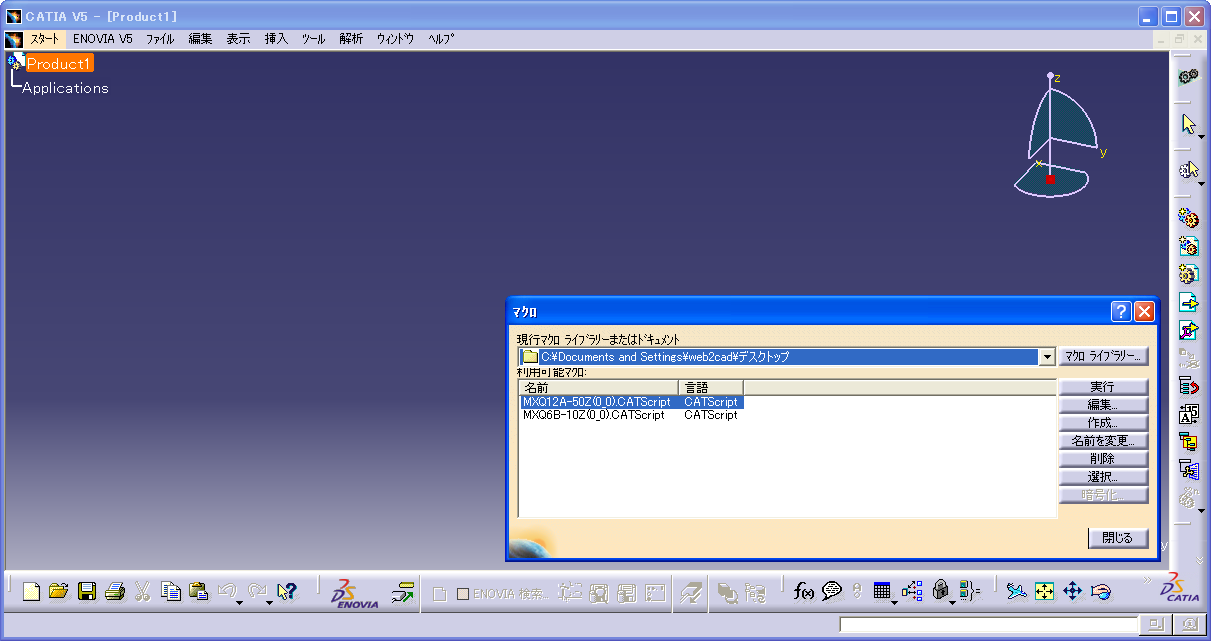
- 2. In the dialog box, select the downloaded macro file.
- 3. A new dialog box will appear, where you can select the destination folder for the CAD data the automatically generated by CATIA.
- 4. Please wait while CATIA automatically generates the 3-Dimensional data.